How to set up a simple testing Kafka stack with Kubernetes running Kafka on AWS
In this article I will introduce a step by step guide to show how you can set up a simple Apache Kafka cluster on a single node Kubernetes cluster running on AWS.
You might find it helpful for testing out Apache Kafka components, operators, inter-broker communication, and major version upgrades with Confluent for Kubernetes operator (CFK).
This setup is an alternative to local minikube or vagrant examples.
The Goal: Setting up Apache Kafka on AWS with Confidence
Creation of single node Kubernetes cluster for Apache Kafka with the accelerated support from the Kind tool and Confluent for Kubernetes operator. The cluster will be accessible from your local machine with kubectl or k9s and it will expose the Confluent Control Center on port 80. You can install a full-flavour Kubernetes cluster of course, but for development / test / learning purposes using Kind is quicker to get up and running.
Ok, before we get started, I will be using the abbreviations CFK (Confluent for Kubernetes) and CP (Confluent Platform).
What is this “Operator” pattern you keep hearing about? – this boils down to a Kubernetes Pod which reacts to certain events of a CRD (Custom Resource Definitions). CRDs are manifests, or yaml files, which allow the extension of the Kubertnetes world to different types of objects (usually use case specific) than those offered by default (pods, services, deployments, ingress). I think of it as a plugin system.
Confluent Platform is just a set of supporting Apache Kafka components. CFK has modelled each of these components in the form of CRDs, and once installed Kubenetes will understand how we can create and configure each object.
Alternatives to Confluent for Kubernetes might be:
Describing the advantages and disadvantages of each is out of scope for this article.
Motivation for Running Kafka on AWS
As a software engineer starting your journey with Apache Kafka you might want to go to Confluent Cloud and with a few clicks get a full cluster up and running on any of the popular cloud providers.
If you are like me and want to understand or tinker with Apache Kafka Kubernetes components and supporting objects, I would recommend starting with a local installation of Minikube, Kind or Kubernetes itself.
CP is very resource intensive, you may find yourself in a situation where you start waiting too long for responses because your setup contains 3x Zookeepers, 3x Apache Kafka brokers, Schema Registry, ksqlDB, Kafka Connect, Source/ Sink Database, multiple producers or consumers and what not. You might actually get the impression that your laptop is starting to melt. Being in this exact situation I came up with the idea to rent better hardware. Build vs Buy is always a factor when it comes to productivity, I recommend a good article from Shopify engineering:
The Journey to Cloud Development: How Shopify Went All-in on Spin
I can think of multiple scenarios this setup might fit:
- Sharing this shiny demo (not local) cluster with a team member or a customer
- Hungry for more RAM or CPU machine
- CPU in x86 architecture (I am on ARM)
- A devops engineer who wants to test quickly helm/CFK/ansible
- Run an integration Kafka test using a Continuous Integration server
- Just for fun, to learn and experiment with Kubernetes operators or your own Apache Kafka cluster 😬
Pre-requisites for Kafka on AWS
A basic understanding of following is recommended:
- Bash scripting.
- Docker, Helm installed.
- Development AWS account.
- VPC with a single Public Subnet and public IP auto-assignment enabled.
- AWS IAM user role to access EC2.
- AWS CLI access.
- At least a passion (if not love) for Apache Kafka. ❤️
5 Steps to Run Kafka on AWS
1. Create an EC2 Instance
We will be using what I call ‘ClickOps’, a pain free, manual setup of AWS in the web console. Future improvements could be to use one of the automation tools like a set of AWS CLI commands organised in bash script, AWS CloudFormation, Ansible or Terraform manifests.
For this project I recommend starting with:
- AMI: Ubuntu 22.04 LTS
- Instance Size: t2.xlarge (4CPU 16 GB RAM)
- EBS Volume: 30 GB of gp2
- Tags: name = kind
Navigate to EC2 Console, click “Launch Instance”, select all above properties.
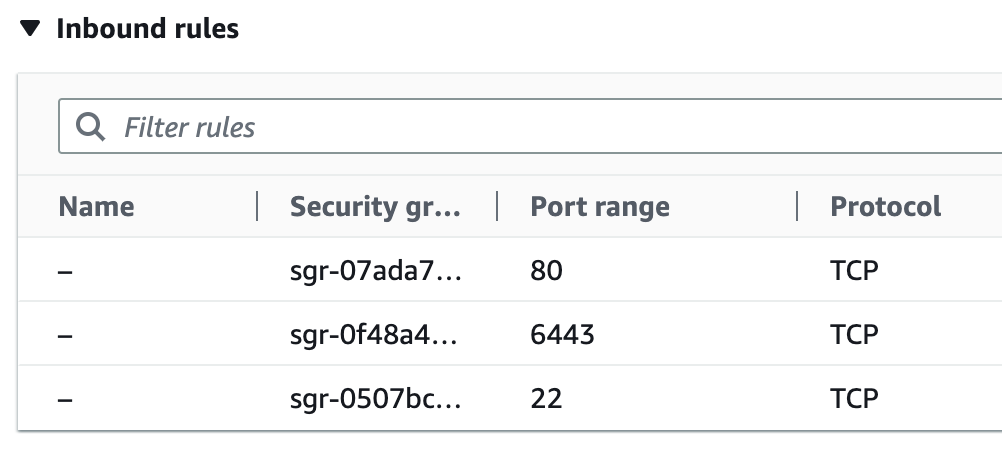
Please make sure that Security Group allows TCP traffic from 22, 80, 6443 ports.
Next, copy the below code and paste in “Advance details” / “User data” as an initiating script that will be run on the first boot of instance.
#!/bin/bash

# Install docker
sudo apt-get update
sudo apt-get install -y cloud-utils apt-transport-https ca-certificates curl software-properties-common
curl -fsSL https://download.docker.com/linux/ubuntu/gpg | sudo apt-key add -
sudo add-apt-repository -y \
   "deb [arch=amd64] https://download.docker.com/linux/ubuntu \
   $(lsb_release -cs) \
   stable"
sudo apt-get install -y docker-ce
sudo usermod -aG docker ubuntu

# Install kind
curl -Lo ./kind https://kind.sigs.k8s.io/dl/v0.17.0/kind-linux-amd64
chmod +x ./kind
sudo mv ./kind /usr/local/bin/kind

# Install kubectl
curl -LO "https://dl.k8s.io/release/$(curl -L -s https://dl.k8s.io/release/stable.txt)/bin/linux/amd64/kubectl"
chmod +x kubectl

# Create k8s cluster
cat <<EOF | kind create cluster --config=-
kind: Cluster
apiVersion: kind.x-k8s.io/v1alpha4
networking:
  apiServerAddress: "0.0.0.0"
  apiServerPort: 6443
nodes:
- role: control-plane
  kubeadmConfigPatches:
  - |
    kind: InitConfiguration
    nodeRegistration:
      kubeletExtraArgs:
        node-labels: "ingress-ready=true"
  extraPortMappings:
  - containerPort: 30200
    hostPort: 80
    protocol: TCP
EOF
Finally, click “Launch Instance”. It will install docker, Kind and create a cluster.
What’s worth noting is the configuration file for Kind. It’s required for opening ports used by kubectl on port 6443 (“networking”) and to open Confluent Control Center (3C) by navigating to port 80 of server’s IP (“extraPortMappings”), which will be more obvious later on while opening externalAccess of type nodePort on the 3C pod.
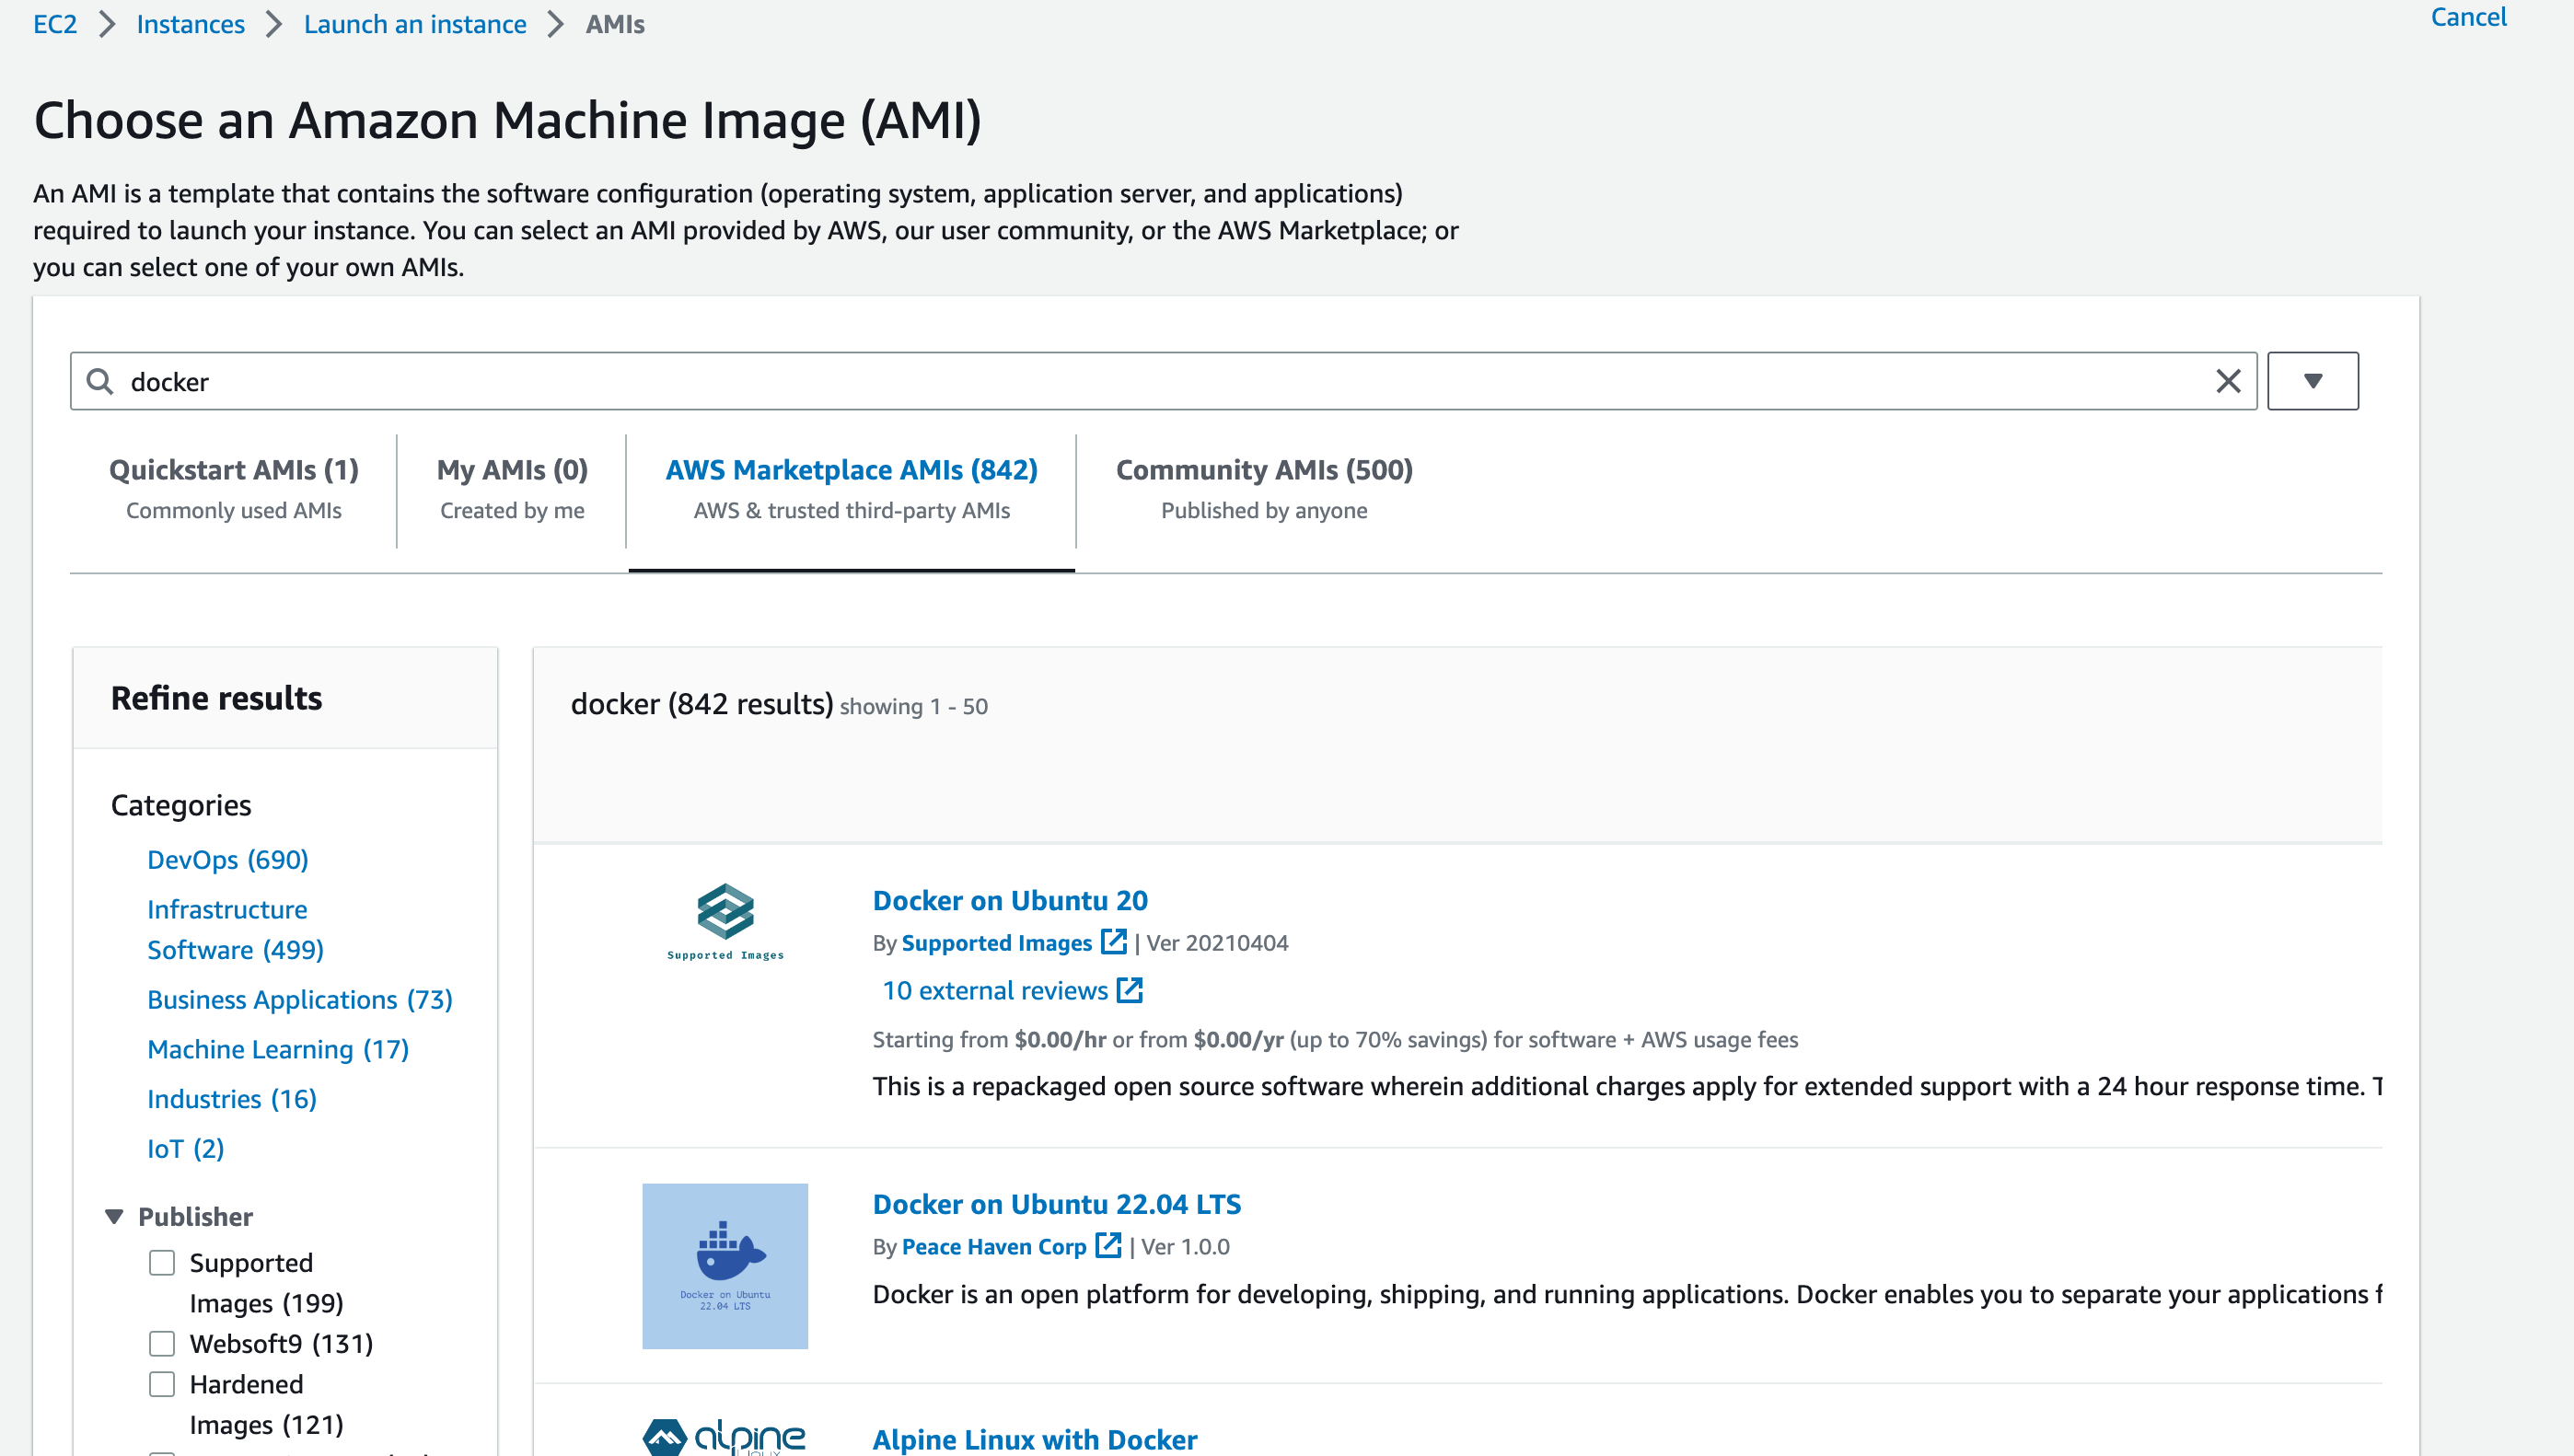
Note: You may want to pick AMI with docker already installed, this will shorten your server startup time.
Save private SSH key, identity file on your local machine. Let’s append SSH config to not clutter the next commands with it.
echo "IdentityFile ~/Downloads/kind-remote-dev-access.pem" >> ~/.ssh/config
2. Copying the Kubeconfig to your Local Machine
To be able to interact with your new Kind Kubernetes cluster, you will need to download the configuration file. We can use the AWS CLI for this. If you are managing multiple AWS accounts, I recommend an amazing tool for AWS profile management called aws-vault.
To download the kubeconfig, start a new shell session using the correct profile (this depends on the profile name you set, mine is osodev).
aws-vault exec osodev
Let’s check if the Kind cluster is ready for action with the next command.
REMOTE_IP=$(aws ec2 describe-instances \
--filters "Name=tag:Name,Values=kind" \
--query "Reservations[*].Instances[*].[PublicIpAddress]" \
--output text) && \


ssh ubuntu@$REMOTE_IP kind get clusters
If successful, you should expect to see only the name of the cluster in the response (no error code) in words. If you see `bash: line 1: kind: command not found` or `No kind clusters found.`, then something has gone wrong. Check the startup logs using:
less /var/log/cloud-init-output.log
Setting Up Access to your Kind Cluster
Next we want to be able to access our cluster from our local machine so we can install, configure and administer Kafka. To grab the configuration and certificate from the remote machine open a terminal window on your local machine and run:
export REMOTE_IP=$(aws ec2 describe-instances \
--filters "Name=tag:Name,Values=kind" \
--query "Reservations[*].Instances[*].[PublicIpAddress]" \
--output text)

ssh ubuntu@$REMOTE_IP kind get kubeconfig > ~/.kindk8s

export KUBECONFIG=~/.kindk8s
sed -i '' -e "s/0.0.0.0/$REMOTE_IP/" $KUBECONFIG
sed -i '' -e "5s/^//p; 5s/^.*/    tls-server-name: kind-control-plane/" $KUBECONFIG
Let’s walk through what each command above does. First, we fetch AWS EC2 instance IP and save it to the REMOTE_IP variable. If you do not use AWS CLI, please copy and replace $REMOTE_IP with the IP from AWS EC2 console.
Next, the SSH command gets kubeconfig and creates a file called .kindk8s in the root of your home directory. The command exports a KUBECONFIG path so that we can use the Sed commands apply required modifications to tell your local kubectl client how to reach the remote cluster.
Now, with following commands you are able to access the remote cluster and apply any Kubernetes manifests.
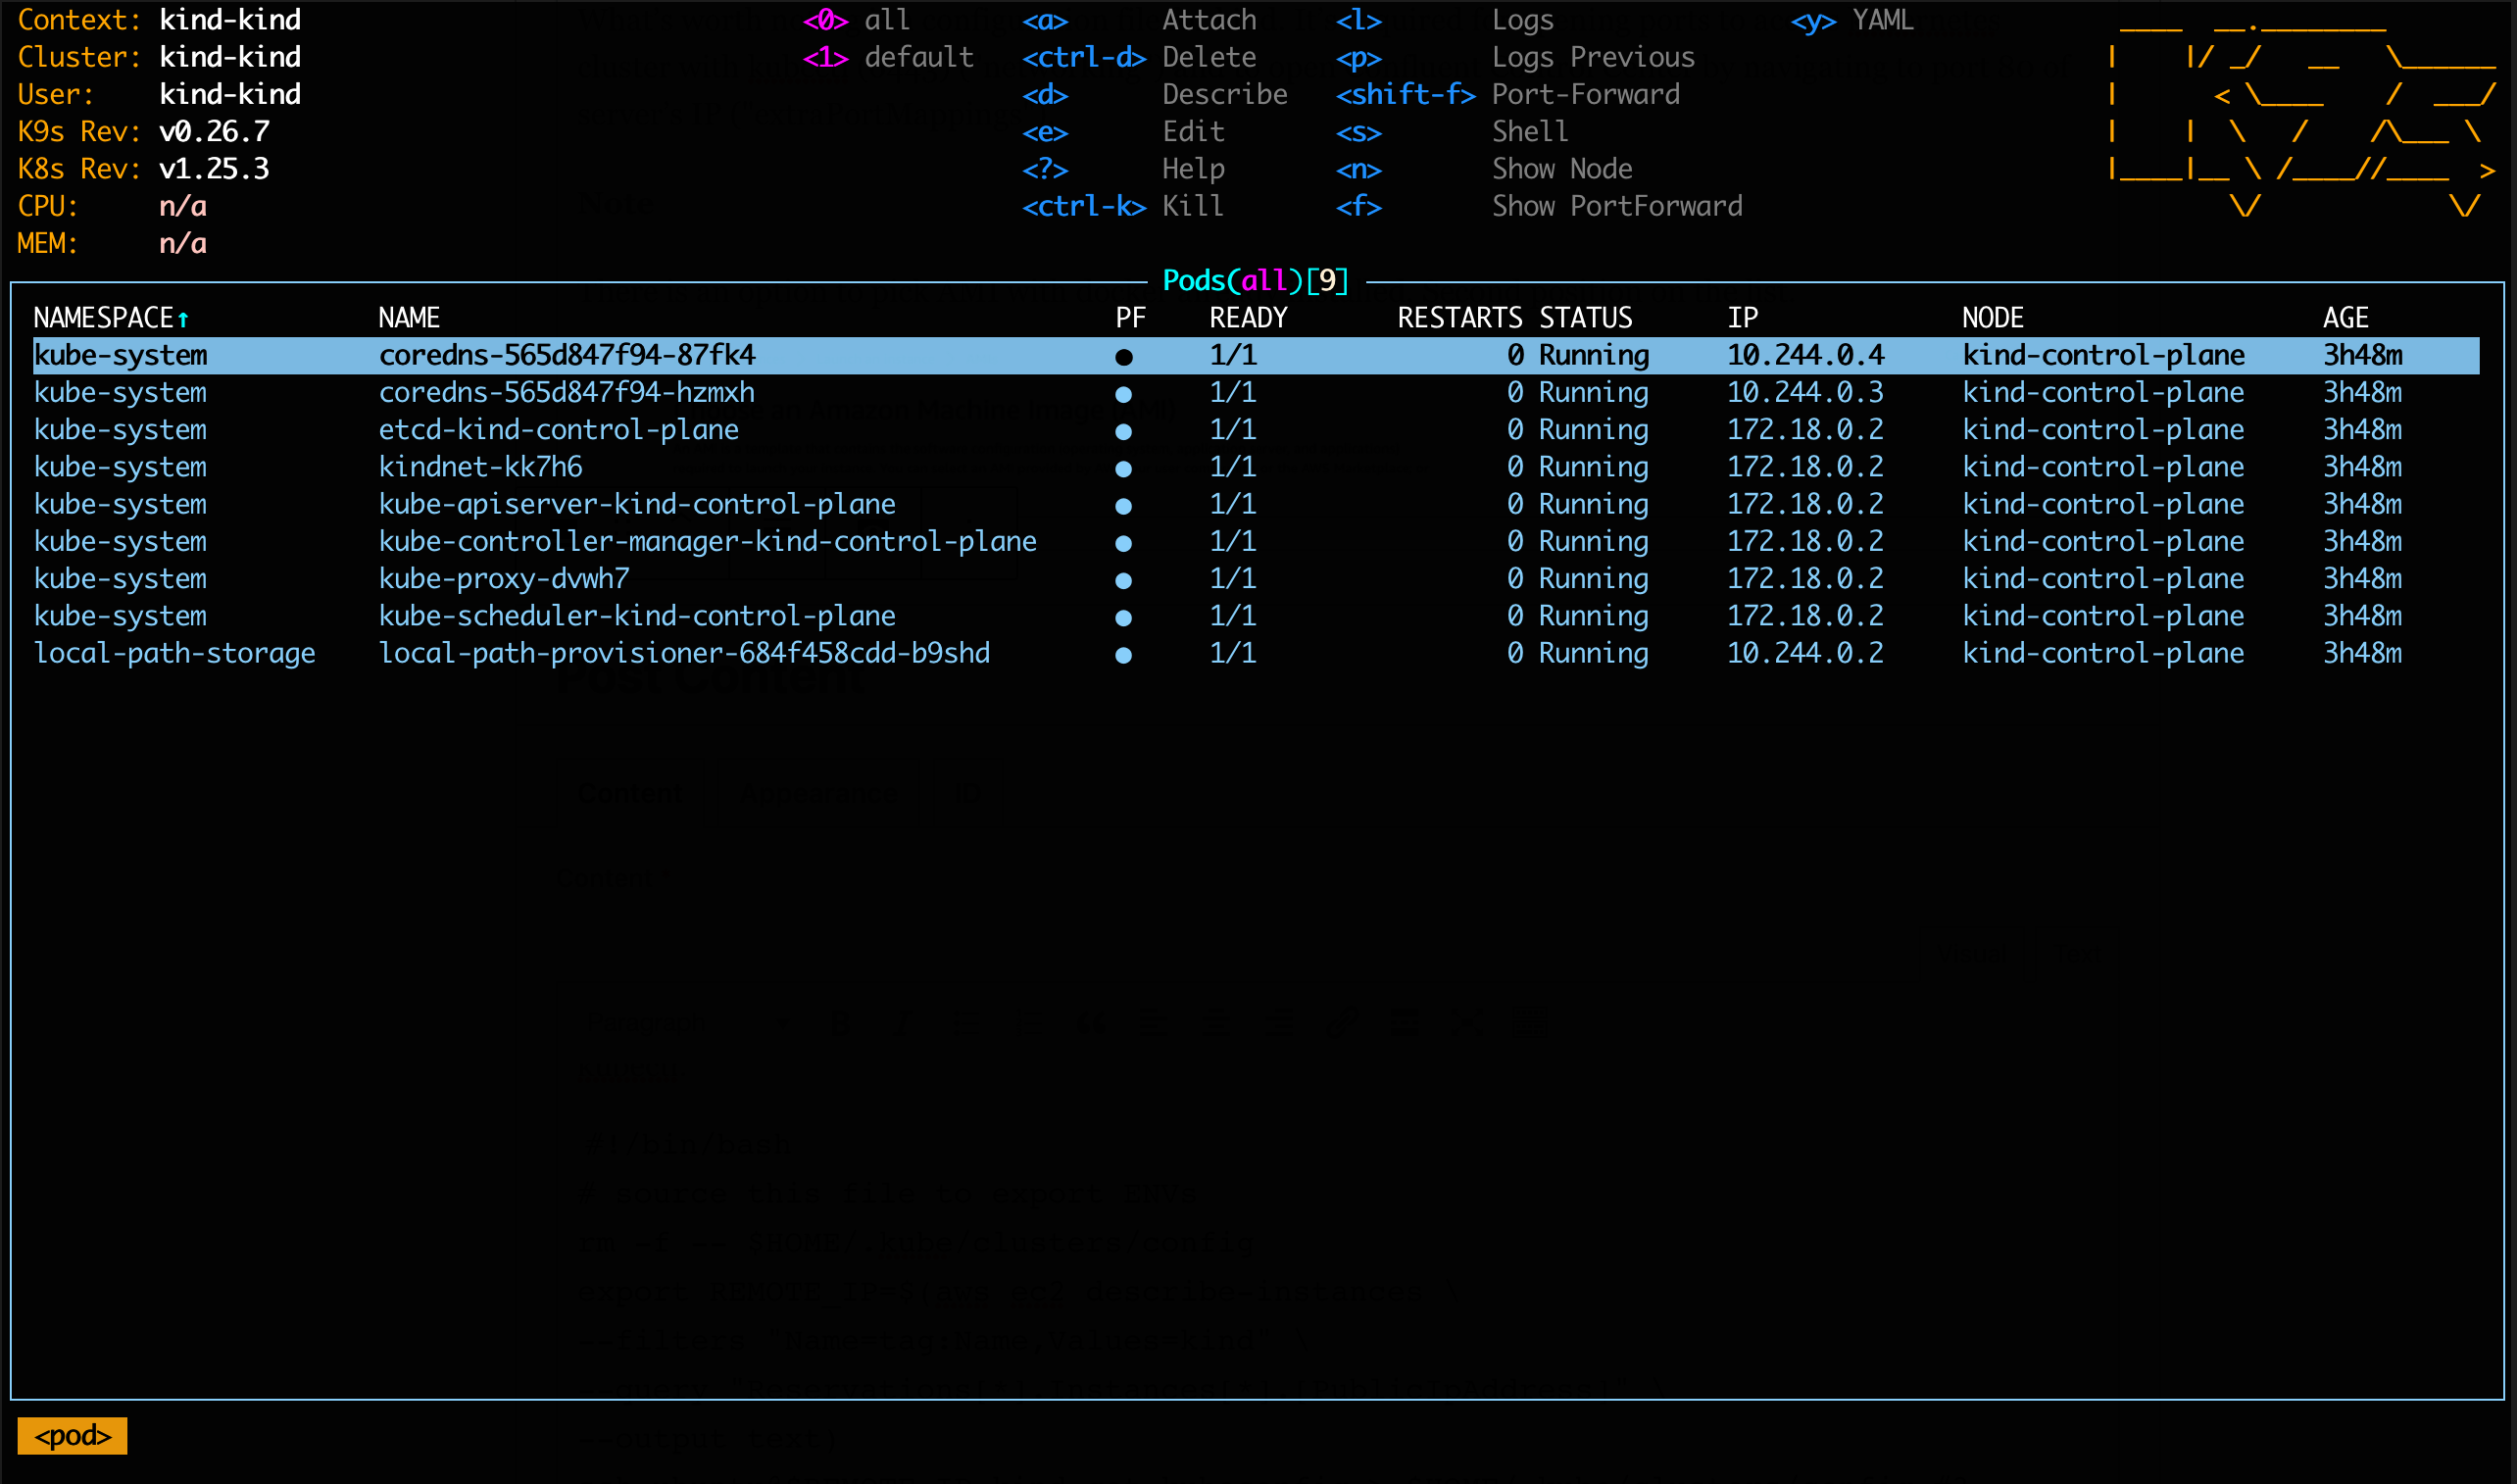
export KUBECONFIG=~/.kindk8s [k9s | kubectl]
If everything looks good and k9s has started you should see a similar output.
3. Install Confluent for Kubernetes (CFK) Operator
Now that we can securely access our cluster and can see what is going on, we can install the Confluent CRDs and packages using the Helm chart provided to us by Confluent. On your local terminal, run the following commands:
helm repo add confluentinc https://packages.confluent.io/helm
helm repo update

helm upgrade --install confluent-operator \
 confluentinc/confluent-for-kubernetes \
 --namespace default --set namespaced=false --version 0.581.16
Note: Version 0.581.16 is the latest as of writing.
To check for an update run:
helm search repo confluent --versions
If successful, you should now have the Confluent operator pod up and running in the default namespace. You can check this using the following command:
Kubectl get pods -n default
The result should look something like this:
4. Create the Confluent Platform CRDs
Now the operator is monitoring the cluster for Confluent CRDs, we can create a new namespace and deploy a manifest containing all the components and their configuration using the following command:
kubectl create ns confluent
kubectl apply -f https://raw.githubusercontent.com/osodevops/kafka-cloud-dev/main/confluent-components.yaml
Applying the above will deploy the following components in your environment:
- 1 x Zookeeper
- 1 x Kafka broker
- 1 x Confluent Control Center
Using this declarative approach we can make use of many other amazing examples given to us by Confluent:
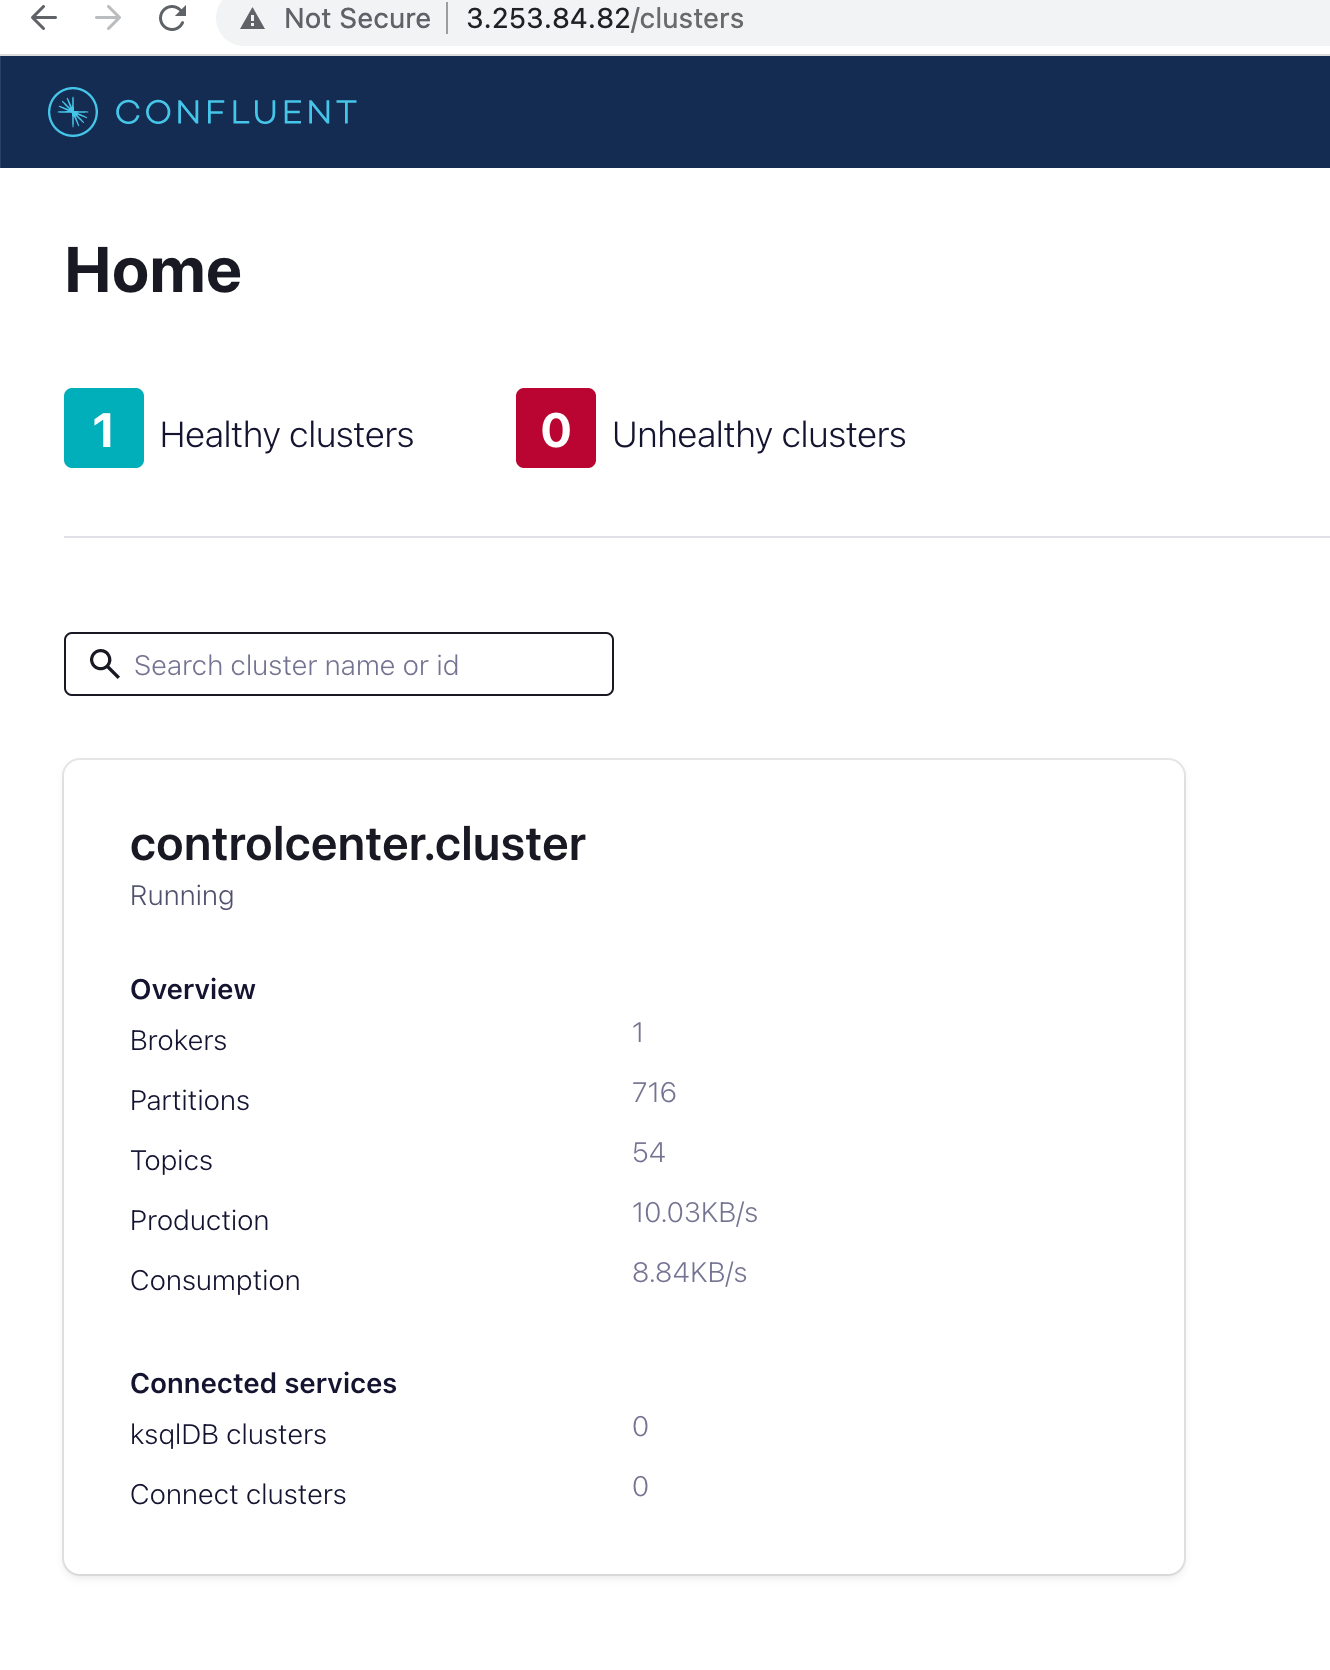
5. Accessing Confluent Control Centre
Give the components times to come up, this should take around ~ 60 seconds. You should then be able to use the Control Center to administer your cluster. Open a new browser window and navigate to:
http://$REMOTE_IP
If you are interested, the key configuration (contained in the yaml file you have applied above) to expose this over the EC2 public IP is shown below:
kind: ControlCenter
...
  externalAccess:
    type: nodePort
    nodePort:
      host: kind-control-plane
      nodePortOffset: 30200

Summary
After a few practice rounds using the above set of commands, it should take less than 10 minutes to build a single node Apache Kafka cluster on Kubernetes.
We could have wrapped all of the above steps into a single script, but this was not the goal here – I wanted to understand how each step works.
Finally, don’t forget to tear down the EC2 instance, otherwise you’ll be charged! You can leave the security group and private key for use next time – these are free 🤗
In conclusion, setting up Kafka on AWS with Confluent for Kubernetes provides a powerful and efficient solution for managing Kafka clusters. By leveraging the Kind tool and the Confluent for Kubernetes operator, you can quickly create a single node Kubernetes cluster, making it accessible from your local machine and exposing the Confluent Control Center. This approach offers a convenient way for development, testing, and learning purposes.
Here are some useful references I used to create this article:
Need some Kafka help or advice?
We love helping companies get the most from Kafka and event streaming. Check out the Kafka Services we offer and get in touch to talk more.
Fore more content:
How to take your Kafka projects to the next level with a Confluent preferred partner
Event driven Architecture: A Simple Guide
Watch Our Kafka Summit Talk: Offering Kafka as a Service in Your Organisation
Successfully Reduce AWS Costs: 4 Powerful Ways
